Here's a short run down on the kitchen remodel I've finally finished. Yes, finished. It only took me two and a half months.
Starting with the kitchen and the house when we moved in:
The first step in the process was probably the most enjoyable. Yes, I am still a little boy in that there is never enough destruction of stuff.

Once I got the old countertop and wall yanked out, the next step required me to tear up the flooring. This was challenging in that you had to cut away each piece of flooring from the glue that cinched it to the floor individually and in as gentle a way as you could not to damage the one next to it. Admittedly it is fun to use a Skil saw to cut directly into the floor. The next step was to cut each plank to fit into the spaces I opened up and then ultimately thread them in one at a time. This was my first fail. Always use more glue that you think you need to get the flooring to completely seal onto the floor. I've got the smallest pockets that mean a light depression every time you step. So...lesson learned.


The flooring actually blended fairly well once it was laid down.

The next step was to move the peninsula into place and secure it to the floor a piece at a time. This is what it looked like stripped down but secure.

Once secured into place the process shifted to building the outer part of the peninsula. For this we decided on a product called
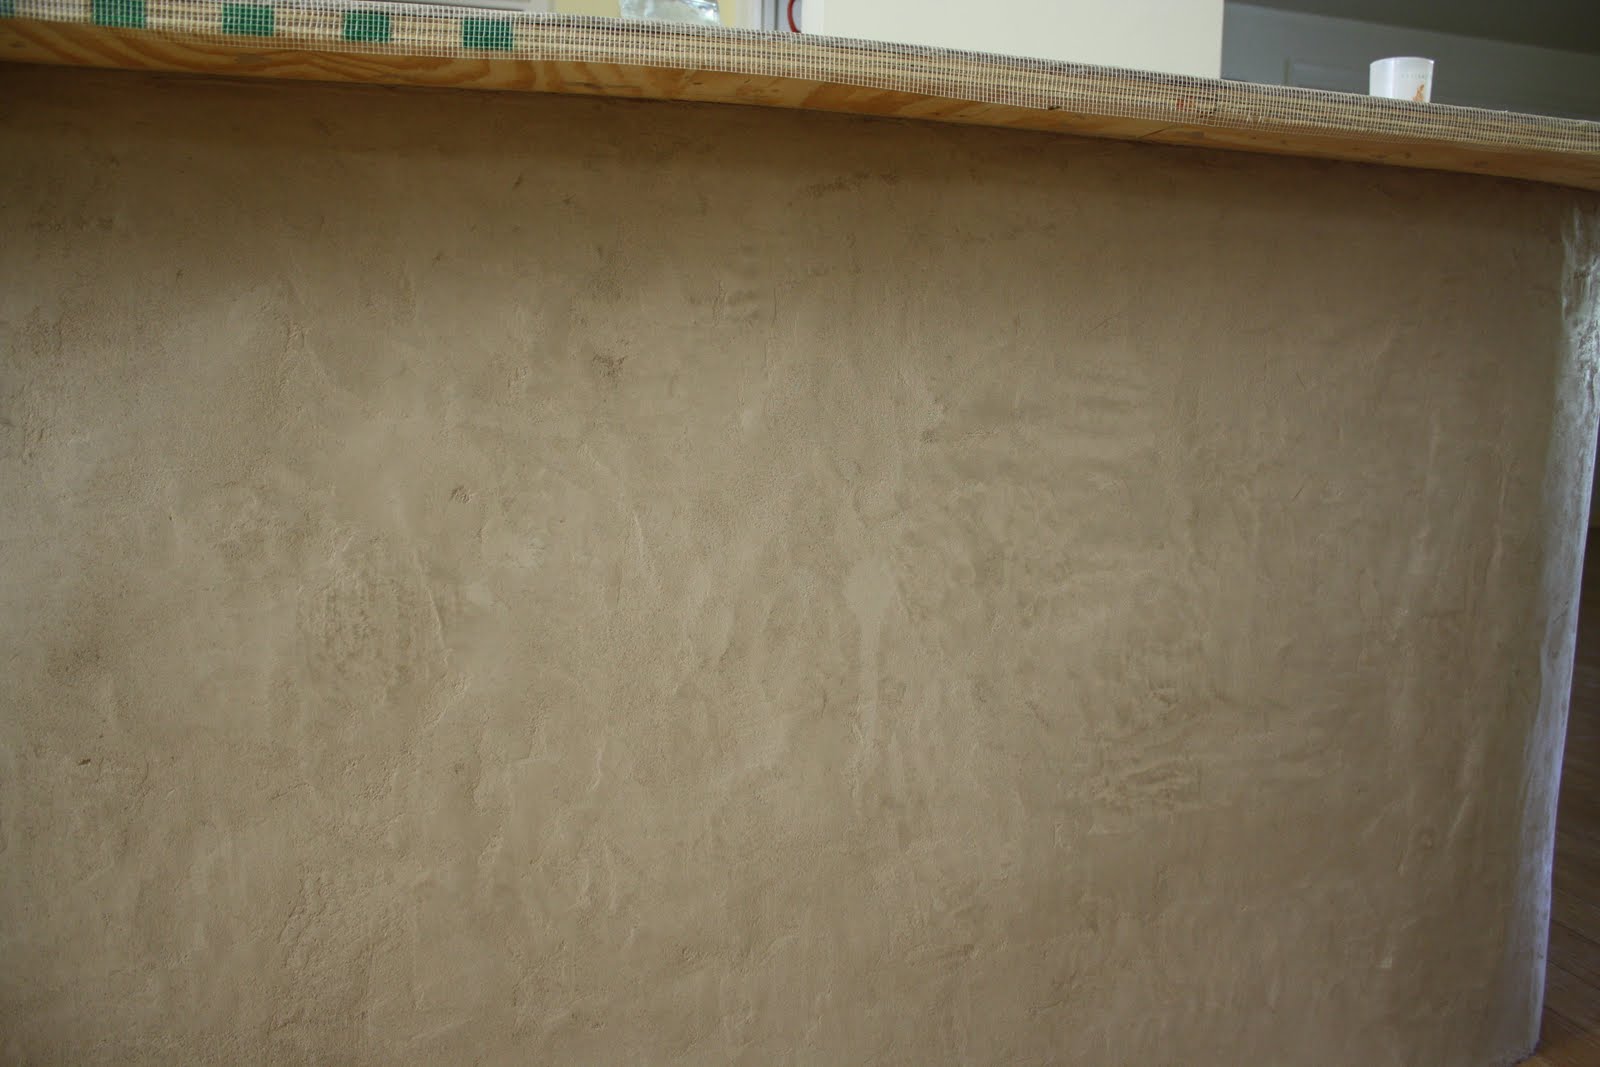
American Clay but in order to finish the outside of the peninsula we had to first build the guts to support the clay. I settled on using a 3/8" wettable plywood secured to the back of the cabinets as the foundation.

To create a foundation on top of the plywood I used 1/2" hardware cloth secured with staples. This gave a substantial lip to put the first scratch coat on that I mixed up using 2 parts medium grain sand to 1 part cement. To build the curve of the countertop I had to frame out a separate piece that had a gentle curve, with gaps filled in by cloth adobe tape (it holds the best under moist conditions).

After this framework was built I began the process of mixing then applying the scratch coat using hand held trowels. I let the consistency of this coat be a little thick and sludgy so that I didn't have as much slump on the vertical surface. After applying this first coat to a generally smooth surface profile, I took a piece of hardware cloth and snipped it off so that I had a six inch long piece with little ends poking out every half inch. I used that to make the scratch coat. The scratch coat is the surface that the second coat of clay adheres to, so you "scratch" the coat to make it rough so that the texture gives more to hold onto.

Once that was finished we topped the peninsula with a three-quarter inch plywood as a base, followed by a 3/8" cement backer board secured down with screws.


Once the scratch coat was set, we began the process of applying the clay. American Clay is actually recycled marble and clay that is pulverized and turned into a wall coating. You can actually use it for regular walls, but in our case we decided to apply it thicker and give the appearance of a larger clay surface.

The mixing is easy with a paddle mixer for your drill.

And the mixed product is smooth like a milkshake.

Then the application is just a slow process of using an adobe hawk and trowel to slowly smooth it onto the wall. We ultimately used two coats to get the best surface.


During this whole period we had been going back and forth about what countertop to use. We actively considered using recycled douglas fir that had been finished with a blackened ebony finish, but ultimately the price scared us away. We settled on tile. We got the tile and I worked my way through laying them all out and slowly but surely cutting every single piece and laying them out on the countertop.

After they get laid out, then they are affixed with mastik using 3/8" spacers to maintain appropriate grout lines. This process is really time consuming but there's no replacement for that... Ultimately the curve proved to be problematic but in the end fewer pieces was better. I think and approximate curve is just fine rather than a perfect one.

Another angle on the tile work prior to grouting.

Finally, we picked the grout we wanted and after cleaning up, we had a beautiful new kitchen. At one point, I spent a day repainting the kitchen and the color we chose actually helped to bring all the colors and textures together and have made the whole look really beautiful.